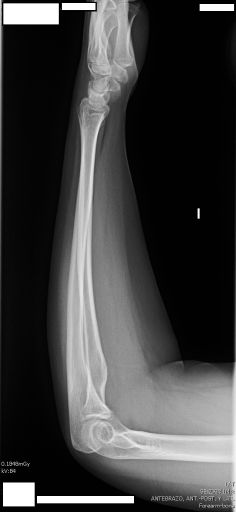
LATERAL FOREARM
Complete lateral projection forearm protocol
Exposure Factors
Low exposure: Optimized parameters for lateral forearm visualization
Visible Anatomical Structures
Should be clearly visible:
- Ulna and radius in their entirety in lateral view
- Carpal bones (proximal row) in profile
- Elbow joint in lateral projection
- Distal portion of humerus
- Superposition of ulna and radius in their middle portion
- Styloid processes ulnar and radial
- Distal radioulnar joint
Superposition Feature in Lateral View
In true lateral projection of the forearm, ulna and radius superpose in their middle portion due to their parallel anatomical arrangement.
This is normal and expected in a correctly positioned lateral view.
Plate Size and Division
Large plate for complete forearm
Second portion for lateral projection
Plate divided longitudinally: The second portion of the plate is used to complete the study with lateral view
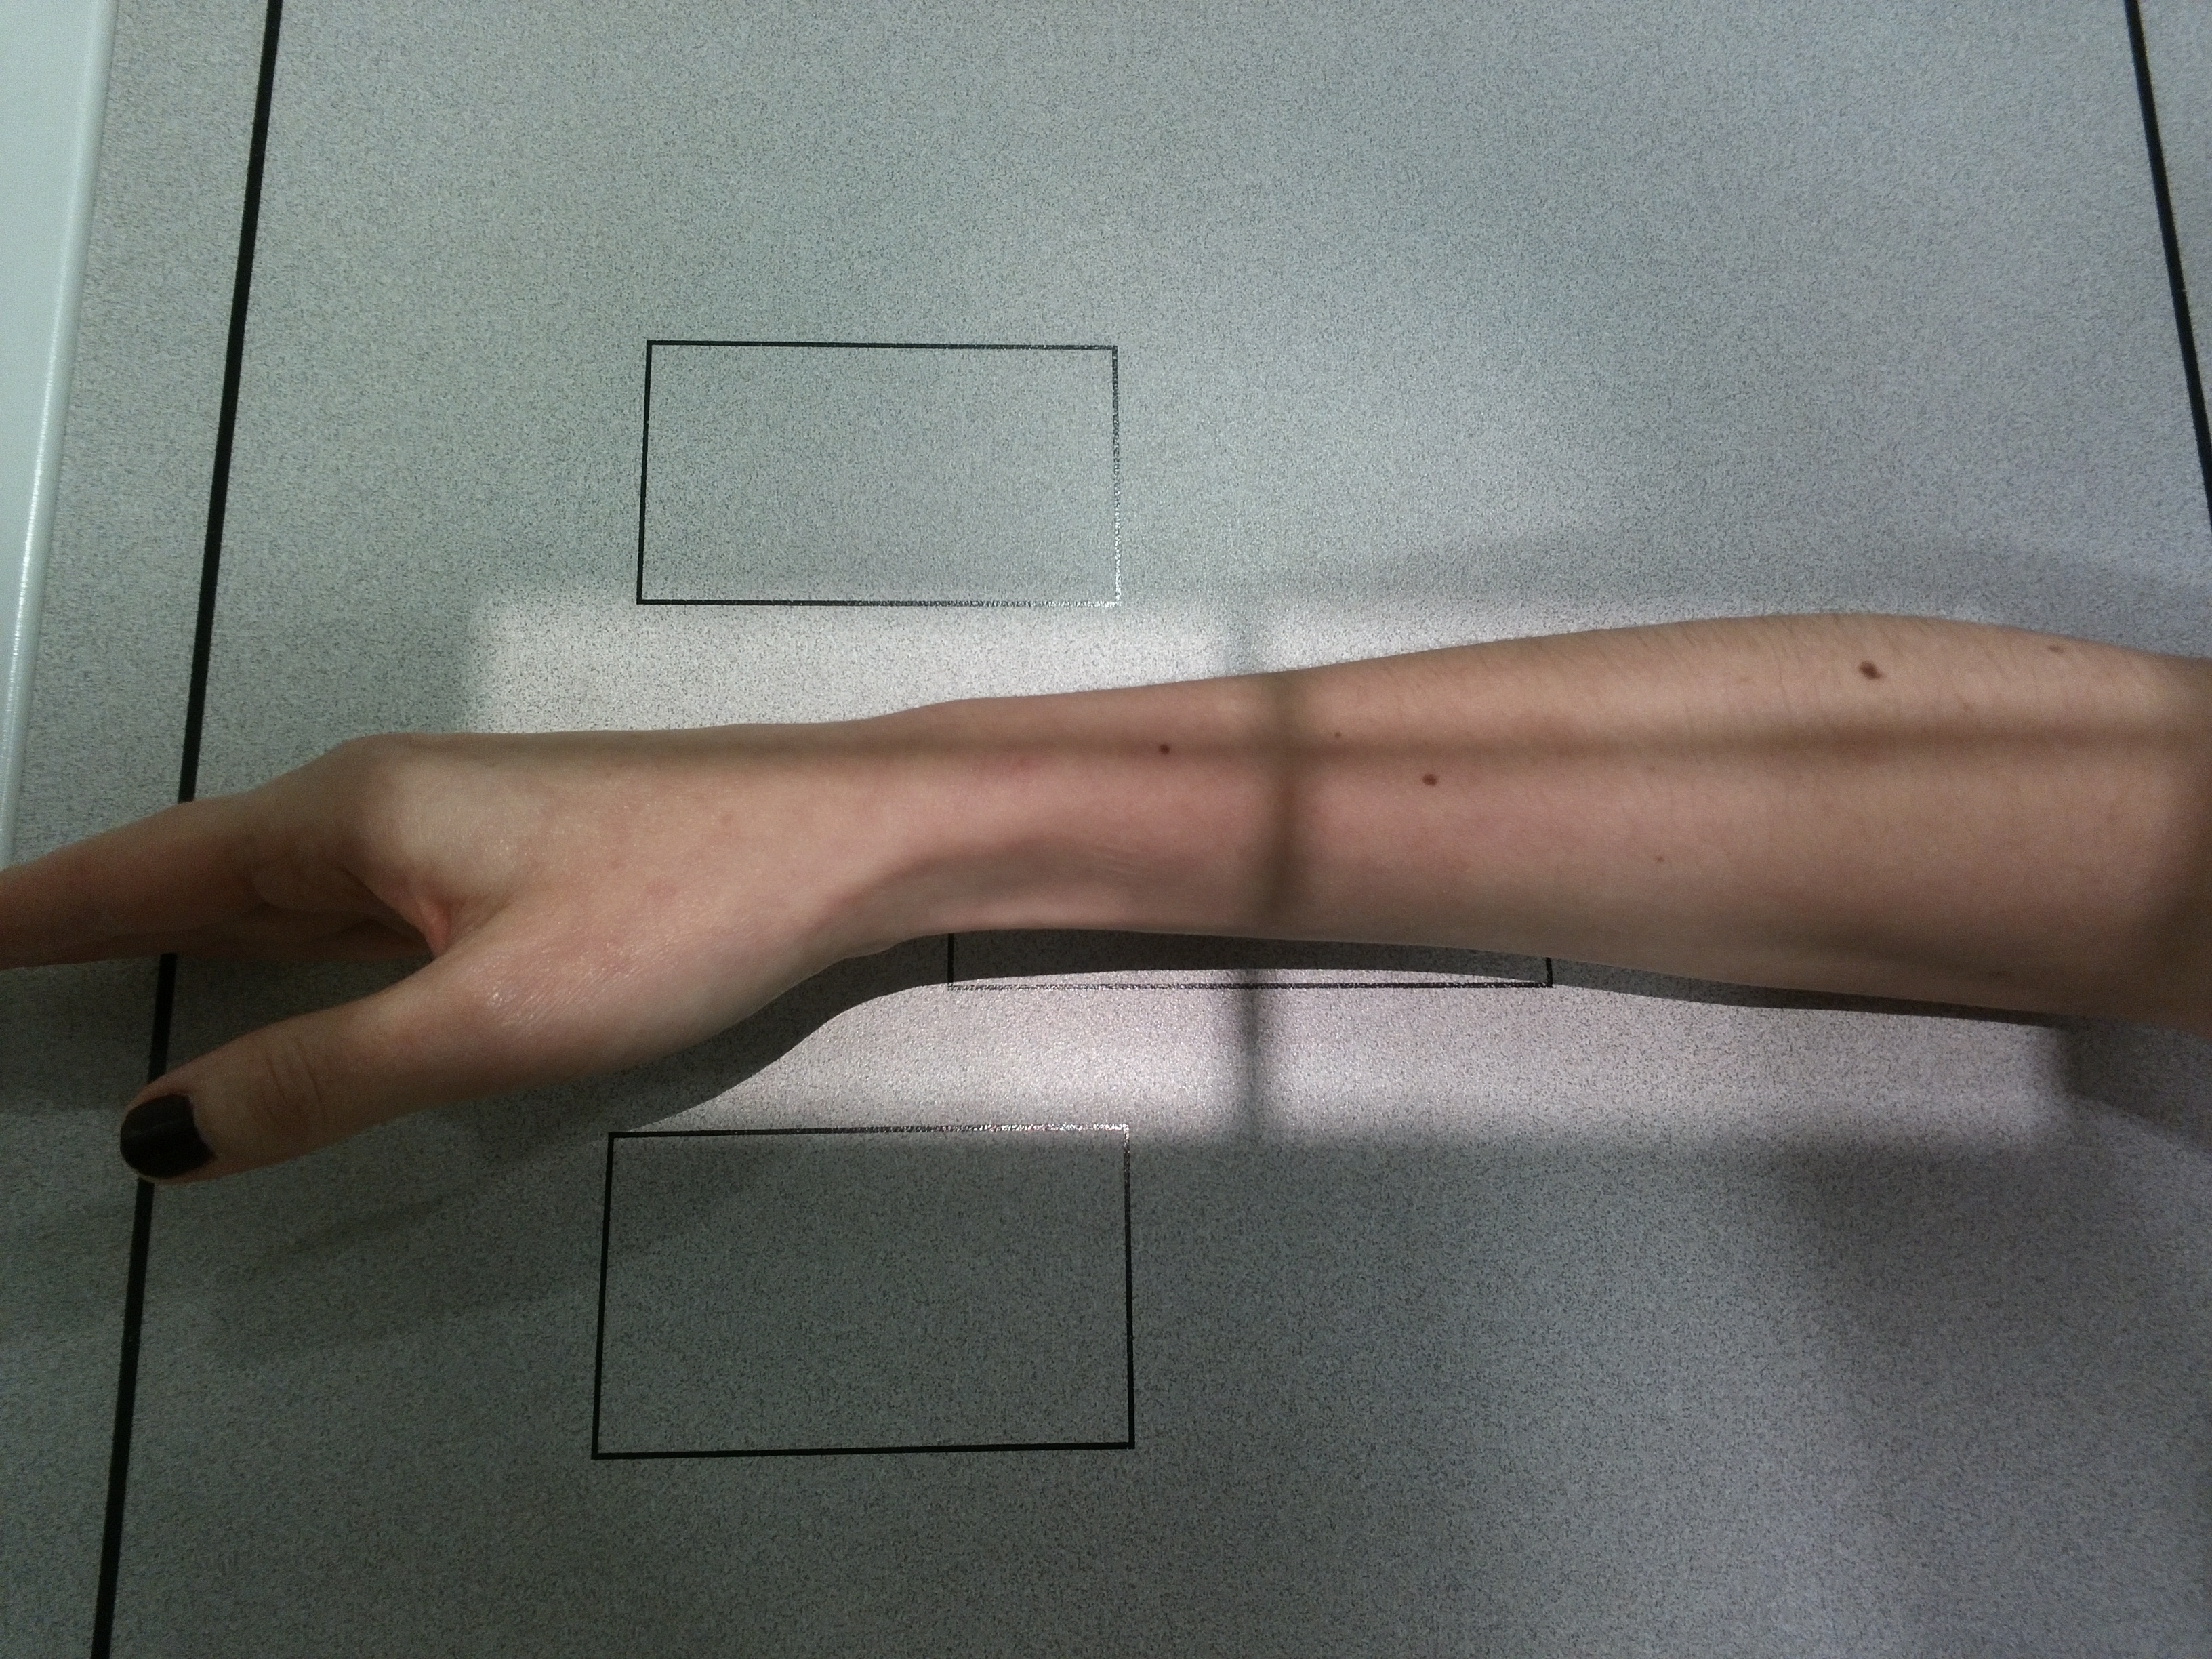
Patient Positioning
Critical Positioning Point
To obtain a true lateral projection of the forearm, the medial (ulnar) surface of the forearm must be in direct contact with the cassette.
This ensures forearm bones are in the correct plane for lateral visualization.
Central Ray Point
Direction: Vertical and perpendicular to midpoint of forearm
Location: Half distance between elbow and wrist
Objective: Middle portion where ulna and radius superpose
Specific Hand and Forearm Position
Hand Position
Hand in lateral position
Thumb upward
Neutral forearm pronation
Contact with Cassette
Medial surface in contact
Ulna directly supported
Radius lateral to ulna
Patient Instructions
"Do not move during exposure"
Maintain position without movement during radiographic exposure
Special attention to keep medial part of forearm in contact with cassette
Optimal Image Characteristics
True lateral view
Middle superposition of ulna and radius
Correct superposition
Ulna anterior to radius in distal portion
Visible joints
Elbow and wrist in profile
Complete field
From distal humerus to carpus
Common Technical Challenges
Frequent problems in lateral forearm projection:
- Forearm rotation causing oblique view
- Poor hand position (not lateral with thumb up)
- Incorrect contact with cassette (not medial surface)
- Incorrect superposition of ulna and radius
- Exclusion of joints due to poor centering
- Poor alignment of longitudinal axis
- Patient movement during exposure
Solution: Ensure medial surface of forearm is in direct contact with cassette and hand in lateral position with thumb upward
Complete Radiological Evaluation
AP Projection
First portion of plate
• General evaluation and alignment
• Separate visualization of ulna and radius
Lateral Projection
Second portion of plate
• Displacement evaluation
• Normal bone superposition
• Profile visualization
Both projections are necessary for complete evaluation of fractures, displacements and forearm alignment